
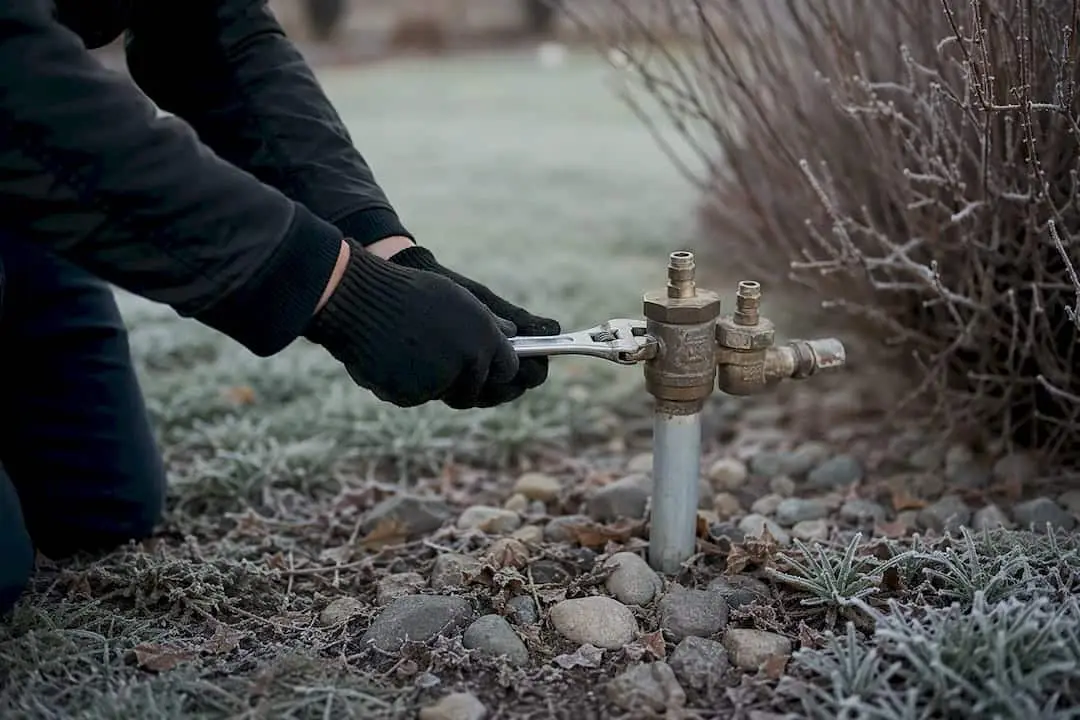
Drain your backflow preventer if the assembly allows it. If you can’t drain it, insulate and enclose it, and add UL-listed heat tape only where exposure demands it. Either way, get a certified tester to check the device after any hard freeze, before you turn the water back on. That’s the entire strategy in one sentence. Everything else in backflow freeze protection is execution detail.
Two rules override every other decision you’ll make this winter:
- Never wrap, cap, or block the relief port on a reduced pressure zone (RPZ) assembly. It has to stay open to discharge.
- Any heat tape or heat cable you install must be UL-listed and plugged into a ground fault circuit interrupter (GFCI) outlet. No exceptions, no extension cords running through standing water.
Winterize before your area’s first hard freeze, not after the forecast scares you. Once ice forms inside a backflow assembly, you’re no longer preventing damage. You’re managing it.
Table of Contents
- How Do You Winterize a Backflow Preventer Step by Step?
- What Are the Best Ways to Insulate a Backflow Preventer?
- What Should You Do If a Backflow Preventer Already Froze?
- When Should You Winterize, and How Does Site Exposure Change the Risk?
- Why Hire a Certified Technician for Backflow Freeze Protection?
- What Most Winterization Advice Gets Wrong
- Get Backflow Freeze Protection Handled Before the Next Cold Front
- Sources
How Do You Winterize a Backflow Preventer Step by Step?
Winterizing a backflow assembly is mechanical, not mysterious. You’re removing standing water from a device that will crack if that water freezes and expands. The sequence matters, and skipping steps is how people end up replacing a $400 assembly instead of protecting a $40 one.
Step 1: Locate and shut the upstream supply valve. Before touching anything else, find the shutoff that feeds the assembly and close it fully. Note the device type, brand, and site location. If you manage multiple properties, a quick photo and location note saves a service call’s worth of confusion later.
Step 2: Open the test cocks and bleed valves. These small ports release trapped pressure and let residual water escape. Leave them open through the winter unless local guidance says otherwise.
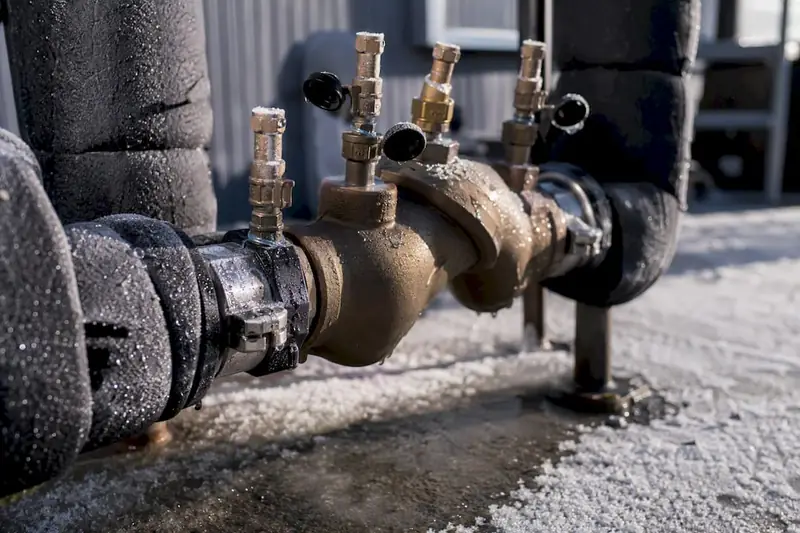
Step 3: Set ball valves to the half-open position. Febco’s draining procedure specifically recommends leaving ball valves at roughly 45 degrees rather than fully closed. A fully closed ball valve can trap a pocket of water between the ball and the seat, and that pocket freezes just as easily as an open pipe.
Step 4: Drain through the inlet and outlet valves. Most assemblies have drain valves at both ends. Open them and let gravity do the work. For longer horizontal runs or sections that won’t drain by gravity alone, a blowout with compressed air clears the line completely. Febco’s technical guidance covers both the drain valve procedure and the compressed air blowout method for different pipe configurations.
Step 5: Follow device-specific steps.
- Pressure vacuum breakers (PVBs): These sit above ground and drain relatively easily. Open the device fully and let it empty; there’s no trapped chamber to worry about the way there is with an RPZ.
- Double check assemblies (DCAs): If the DCA sits in a below-grade valve box, drainage is the priority since insulation inside a wet vault does little good. Get the water out before you add any wrap.
- Reduced pressure zone assemblies (RPZs): Drain both check valve chambers completely and confirm the relief valve discharges freely afterward. Never let insulation, tape, or a cover restrict that relief port, even temporarily.
Never operate, cycle, or force a valve on a device you suspect is already frozen. Forcing a frozen ball valve or test cock is one of the fastest ways to crack a housing that would have otherwise thawed intact.
Pro Tip: Keep a laminated card zip-tied to each assembly listing its shutoff location and drain valve positions. When a maintenance tech who’s never seen the property before gets the call during a cold snap, that thirty-second reference saves real time.
For a breakdown of how these steps differ across PVB, DCA, and RPZ hardware, see our property owner’s guide to backflow preventer types.
What Are the Best Ways to Insulate a Backflow Preventer?
Draining is the first line of defense, but not every assembly can be fully drained, and not every property owner wants to shut down irrigation or fire-line water for the season. That’s where insulation, covers, heat, and enclosures come in, and this is where most of the actual product decisions live.
Closed-cell foam pipe insulation is the baseline. Wrap it around exposed piping on both sides of the assembly, and don’t stop at the pipe. Extend coverage over the valve body itself, since that’s usually the thickest metal mass and the slowest to warm back up once temperatures drop. Foam insulation is inexpensive and easy to install, but it only slows heat loss. It doesn’t generate any, which matters once the mercury stays down for more than a night or two.
Insulated backflow covers and thermal blankets wrap the entire above-ground assembly in one piece rather than piecemeal pipe wrap. They work well for shorter freeze events, especially when paired with the drainage steps above. Combining drainage with insulation is consistently the more reliable approach compared to insulation alone, according to SprinklerWarehouse’s winterization guidance — insulation slows heat loss, but it can’t compensate for water still sitting inside the device.
Heat tape and heat cable step in when insulation alone isn’t enough, particularly on exposed sites or during extended cold spells. A few non-negotiables here:
- Use only UL-listed heat tape or heat cable rated for outdoor plumbing use.
- Plug it into a GFCI-protected circuit. Ground fault protection isn’t optional around outdoor water assemblies.
- Use a thermostat-controlled unit rather than one that runs continuously, both for energy cost and to avoid overheating rubber seals.
- Never let heat cable overlap itself when wrapping. Overlapping runs can create hot spots that damage the cable’s insulation.
- Never route heat tape directly over or across an RPZ relief port. It needs to discharge, not be sealed under wraps of any kind.
Atlas Backflow’s freeze protection guidance treats heat cable as a supplement for high-risk sites rather than a standalone fix, and that framing is accurate. Heat tape fails when the power goes out, and Houston-area ice storms have a track record of taking out power right when you need heat the most.
Enclosures solve a different problem: physical exposure. A well-built enclosure is ventilated enough to avoid trapping moisture, lockable to prevent tampering, and designed with drainage at the base so it doesn’t become a water trap of its own. Elevate the enclosure base on flood-prone sites, and make sure the RPZ relief port and test cock access remain reachable without disassembling the box.
Freeze-detection and auto-shutdown systems are worth the added cost on critical service lines, particularly fire lines where a frozen or burst backflow assembly doesn’t just waste water, it can take a fire suppression system offline. These systems monitor temperature at the device and can trigger an alert or automatic shutoff before ice fully forms, which matters most on properties where nobody walks the mechanical yard daily during a cold spell.
One detail worth remembering: insulation, heat tape, and enclosures each address a different failure mode. Insulation slows heat loss. Heat tape adds heat. Enclosures block wind and physical exposure. Using only one of the three on a high-exposure site is how “protected” assemblies still end up cracked every winter.
What Should You Do If a Backflow Preventer Already Froze?
Shut the upstream supply immediately if you haven’t already, and isolate the downstream side if there’s any indication of a crack or leak. Photograph the assembly’s condition before you touch it further. That photo matters if you end up filing an insurance claim or need documentation for a water purveyor.
Thaw it slowly, and only with ambient heat. Space heaters positioned at a safe distance, warm towels, or simply letting outdoor temperatures rise naturally are all acceptable methods. What’s not acceptable: open flame, propane torches, or any direct high-heat tool. Atlas Backflow’s emergency guidance is blunt about this, and for good reason. Direct flame against a frozen brass or bronze housing can warp the metal, damage internal seals instantly, and create a fire hazard on a property that’s already dealing with one plumbing emergency.
Once it’s thawed, work through a basic visual inspection before assuming everything is fine:
- Check for bulged or distorted bonnets on the check valve housings.
- Look for hairline cracks in the housing, especially around threaded fittings. These can be nearly invisible and still fail catastrophically once the line is repressurized.
- Inspect test cocks for leaking or a loose fit.
- Confirm the relief valve on an RPZ hasn’t been compromised or is stuck open or shut.
Pro Tip: A hairline crack that shows no active leak at zero pressure can still blow out completely once the system is back to normal operating pressure. Visual inspection alone is not a pass. That’s exactly why testing matters more than a quick look.
Even when the exterior looks intact, the rubber discs, springs, and seals inside may have degraded from the freeze cycle in ways you can’t see from outside the housing. A certified technician needs to test the assembly and, in many cases, rebuild it with fresh internal parts before you repressurize the line. Skipping that step and just turning the water back on is how a “minor” freeze turns into a sudden failure weeks later, usually at the worst possible time. Our backflow preventer testing guide for Houston property managers walks through what that certified test actually involves.
When Should You Winterize, and How Does Site Exposure Change the Risk?
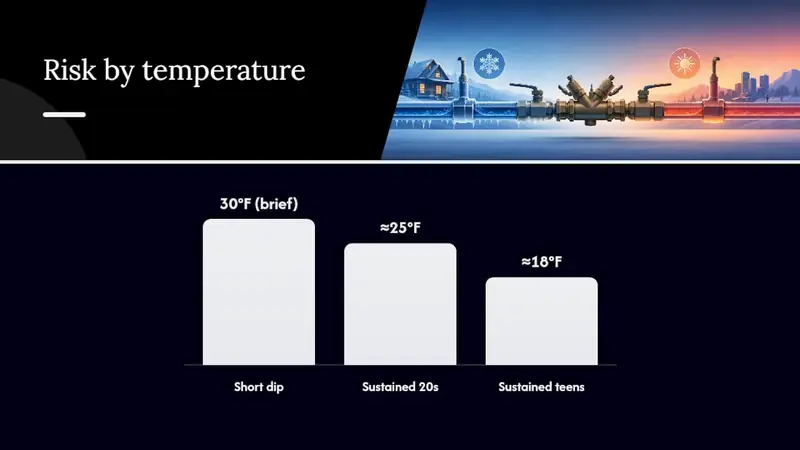
Water freezes at 32°F, but that number alone doesn’t tell you how much danger your assembly is actually in. Duration and wind matter more than the thermometer reading. A quick dip to 30°F overnight rarely damages a well-drained assembly. Sustained temperatures in the low 20s or high teens, especially combined with wind, are what actually crack housings and split pipe. South Jersey Backflow’s freeze-threshold breakdown makes the same point: wind exposure effectively lowers the temperature the assembly experiences, so two properties at the same air temperature can face very different levels of risk depending on how exposed the device sits.
Complete your winterization before your region’s first hard freeze of the season, not after a cold front is already forecast for the weekend. In much of the Houston area, that means having drainage and insulation in place well ahead of the first real Arctic push, typically sometime between late November and January, since municipal cold-weather advisories around the Gulf Coast tend to arrive with only a few days’ notice.
Site placement affects risk as much as regional climate:
- Position assemblies near heat-radiating walls where feasible rather than in open, wind-exposed corners.
- Block wind funnels created by fences, gaps between buildings, or open carports.
- Elevate assemblies away from flood-prone low points, and confirm drainage paths stay clear.
- Walk the property again after any prolonged cold spell or flooding event. Conditions change, and insulation that held up in November can shift or degrade by February.
Why Hire a Certified Technician for Backflow Freeze Protection?
Some situations call for a professional, not a DIY fix. Call a certified technician when a device has been through any freeze event and needs testing before repressurization, when an RPZ’s relief valve function is in question, when the assembly feeds a fire line or other life-safety system, or when a rebuild involves code documentation your water purveyor requires on file.
Professional service on a frozen or freeze-damaged assembly typically includes:
- Safe isolation of the line before any work begins.
- Certified testing to confirm the assembly meets code requirements before it goes back into service.
- Rebuild or full parts replacement for degraded discs, springs, and seals.
- Sanitization procedures if the device was submerged during flooding.
- Documentation delivered to your local water purveyor, since most municipalities require proof of a passed test after any repair.
Reliable-fire-protection handles backflow preventer inspection, testing, and repair across the Houston area, including the fire-line-connected assemblies where a freeze failure isn’t just a water bill problem. It’s a life-safety compliance issue.
Backflow freeze protection works best when drainage, insulation, and professional testing happen in that order, with certified inspection required after any freeze event before repressurization.
| Point | Details |
|---|---|
| Drain first when possible | Open test cocks, set ball valves half open, and use drain valves or compressed air blowout to clear water. |
| Combine insulation with drainage | Foam wrap and thermal covers slow heat loss but don’t replace draining standing water from the assembly. |
| Use UL-listed heat tape carefully | Run heat cable on a GFCI circuit with a thermostat, and never route it across an RPZ relief port. |
| Never force a frozen device | Thaw slowly with ambient heat only, never open flame, and photograph damage before repairs begin. |
| Reliable-fire-protection handles post-freeze testing | Certified inspection, rebuilds, and documentation are available for Houston-area backflow assemblies, including fire-line connections. |
What Most Winterization Advice Gets Wrong
Most guides treat backflow freeze protection like a single decision: insulate it, done. That’s backward. The research is consistent that drainage is the actual foundation, and insulation is a supplement for water you couldn’t fully remove. A beautifully wrapped assembly still sitting full of water is a slower-failing assembly, not a protected one.
The other gap is the assumption that a device “looks fine” after a freeze means it’s fine. It doesn’t. Rubber discs and springs degrade in ways you can’t see from outside a brass housing, and a hairline crack at zero pressure can blow out completely once the line repressurizes. That’s not caution for caution’s sake. It’s the actual failure mode.
If you manage more than one property, prioritize the ones with fire-line-connected backflow assemblies first. A frozen irrigation backflow is an inconvenience. A frozen fire-line backflow is a life-safety gap that might not show up until the worst possible moment.
— Results
Get Backflow Freeze Protection Handled Before the Next Cold Front
Reliable-fire-protection is the option for Houston property owners who don’t want to gamble on DIY winterization holding up through an unpredictable Gulf Coast freeze. Where insulation and heat tape can fail quietly (a tripped GFCI, a wind-battered foam wrap nobody rechecked in January), a certified technician catches the problem before it becomes a burst assembly or a compromised fire line.
Reliable-fire-protection’s technicians install and service backflow preventers across Houston-area residential, commercial, and fire-line-connected properties, and that fire-safety focus is what sets the service apart from a general plumber. A frozen backflow on a fire suppression system isn’t just a repair job, it’s a life-safety issue, and that’s exactly the category Reliable-fire-protection specializes in. If your property has already been through a freeze this season, or you want winterization and testing scheduled before the next one hits, start with a backflow preventer service consultation and get a certified inspection on the calendar now, while there’s still time before the next hard freeze.
Sources
- Pressure Vacuum Breaker Draining Procedure for Freeze Protection (Febco)
- Winterizing your backflow preventer to prevent freeze damage — SprinklerWarehouse
- What temperature damages a backflow preventer; how to protect — South Jersey Backflow