
Running a commercial building in Houston means balancing tenant safety with the demands of ever-changing fire codes. Fire sprinkler installation requirements are shaped by building size, occupancy type, and use, with the International Building Code and NFPA 13 setting critical benchmarks. Getting the first steps right ensures your project stays compliant, avoids costly changes later, and gives you peace of mind that tenants are protected from the start.
Table of Contents
- Step 1: Assess Property Needs And Review Regulations
- Step 2: Plan Sprinkler Layout And Select Components
- Step 3: Prepare Workspace And Gather Required Permits
- Step 4: Install Fire Sprinkler Pipes And Heads Securely
- Step 5: Test System Functionality And Inspect For Leaks
Quick Summary
| Key Point | Explanation |
|---|---|
| 1. Assess Property Needs Thoroughly | Document your building’s details and local codes to ensure compliance and avoid costly changes later. |
| 2. Plan Sprinkler Layout Carefully | Design the system layout considering hazard levels and building features to ensure full coverage during a fire. |
| 3. Obtain Required Permits Before Installation | Start the permitting process early to avoid delays and ensure compliance with local regulations during installation. |
| 4. Install Components with Precision | Each sprinkler head and pipe must be installed correctly to ensure effective operation and compliance with standards. |
| 5. Conduct Rigorous System Testing | Perform comprehensive tests to check for leaks and ensure system functionality before inspection and certification. |
Step 1: Assess property needs and review regulations
Before you call any contractors or purchase equipment, you need to understand exactly what your building requires. This step determines everything that follows, from system design to budget to timeline. Think of it as the foundation for your entire project. Your property’s specific characteristics and local regulations will dictate which codes apply to you, and getting this wrong means costly changes down the road.
Start by gathering basic information about your building. Document the square footage, number of stories, occupancy type (office, retail, warehouse, mixed use), and current occupant load. These details matter because fire sprinkler codes vary based on building size, occupant load, and use. A 5,000 square foot retail space has different requirements than a 50,000 square foot warehouse. Next, identify your building’s construction type and any previous fire suppression systems. Then review which codes apply to you. The International Building Code and NFPA 13 set baseline requirements, but here’s the critical part: local amendments often affect exact requirements. Houston and surrounding Texas jurisdictions may have specific amendments that differ from the national standards. Contact your local fire marshal’s office or building department and ask directly what sprinkler requirements apply to your property based on its current use and classification. Get everything in writing so you have documentation of what you discussed. If your building is older or you’re planning any renovations, ask specifically about retrofit requirements, as existing buildings are increasingly required to install sprinklers due to safety concerns. This conversation also helps you understand timelines. Some jurisdictions require sprinkler installation before occupancy changes, while others allow phased implementation. Ask about permit requirements, inspection schedules, and any other compliance deadlines you need to meet.
Once you have this information, you’ll know whether you’re dealing with a basic system, a complex multi-zone setup, or something in between. You’ll also know your compliance deadline, which affects everything else. This groundwork saves you from surprises later and ensures your contractor designs a system that actually meets your jurisdiction’s specific standards.
Below is a summary of essential building characteristics to document for fire sprinkler planning:
| Characteristic | Why It Matters | Example Value |
|---|---|---|
| Square Footage | Affects code requirements and layout | 10,000 sq ft |
| Occupancy Type | Determines hazard classification | Warehouse |
| Construction Type | Impacts retrofit needs and system choice | Concrete tilt-up |
| Occupant Load | Influences system scale and coverage | 120 people |
Pro tip: Create a simple spreadsheet documenting your building’s key characteristics, the codes that apply, specific requirements from your fire marshal, and any deadlines you’ve been given. Share this with your potential contractors so everyone works from the same baseline information and avoids costly misunderstandings.
Step 2: Plan sprinkler layout and select components
With your building’s requirements documented, you’re ready to design the actual system. This step involves deciding where sprinkler heads go, what type of system you need, and which components will deliver water effectively throughout your space. Getting this right means the difference between a system that protects your property and one that leaves blind spots where a fire could spread unchecked.
Start by classifying your building’s hazard level, which determines everything else. Light hazard buildings (offices, schools) need less aggressive coverage than ordinary hazard spaces (retail, warehouses) or high hazard areas (manufacturing with flammable materials). Your fire marshal’s office can confirm your building’s classification based on its use. Once you know the hazard level, you’ll select your system type. Wet systems, the most common choice for Houston properties, keep pipes filled with water and discharge immediately when a sprinkler head activates. Dry systems use pressurized air instead of water and work better in unheated spaces like parking garages or outdoor covered areas. Pre-action and deluge systems offer specialized protection for high-risk spaces. Next comes the critical layout work. Fire sprinkler system design requires evaluating water supply capacity and positioning heads for optimal coverage. Your designer will map out which areas require sprinklers based on your building layout, then determine proper spacing and orientation in three dimensions. Think about obstructions like beams, ductwork, light fixtures, and tall shelving. Sprinkler heads must have clear water paths to the floor and cannot be blocked by building features or stored inventory. The positioning rules seem rigid because they are. NFPA 13 standards specify exact spacing distances and orientation requirements to ensure every square foot receives adequate water distribution if a fire starts. Your designer will also size pipes carefully. Undersized pipes restrict water flow and reduce pressure, while oversized pipes waste money and space. The piping network must deliver the right volume at the right pressure to every head simultaneously during a fire.
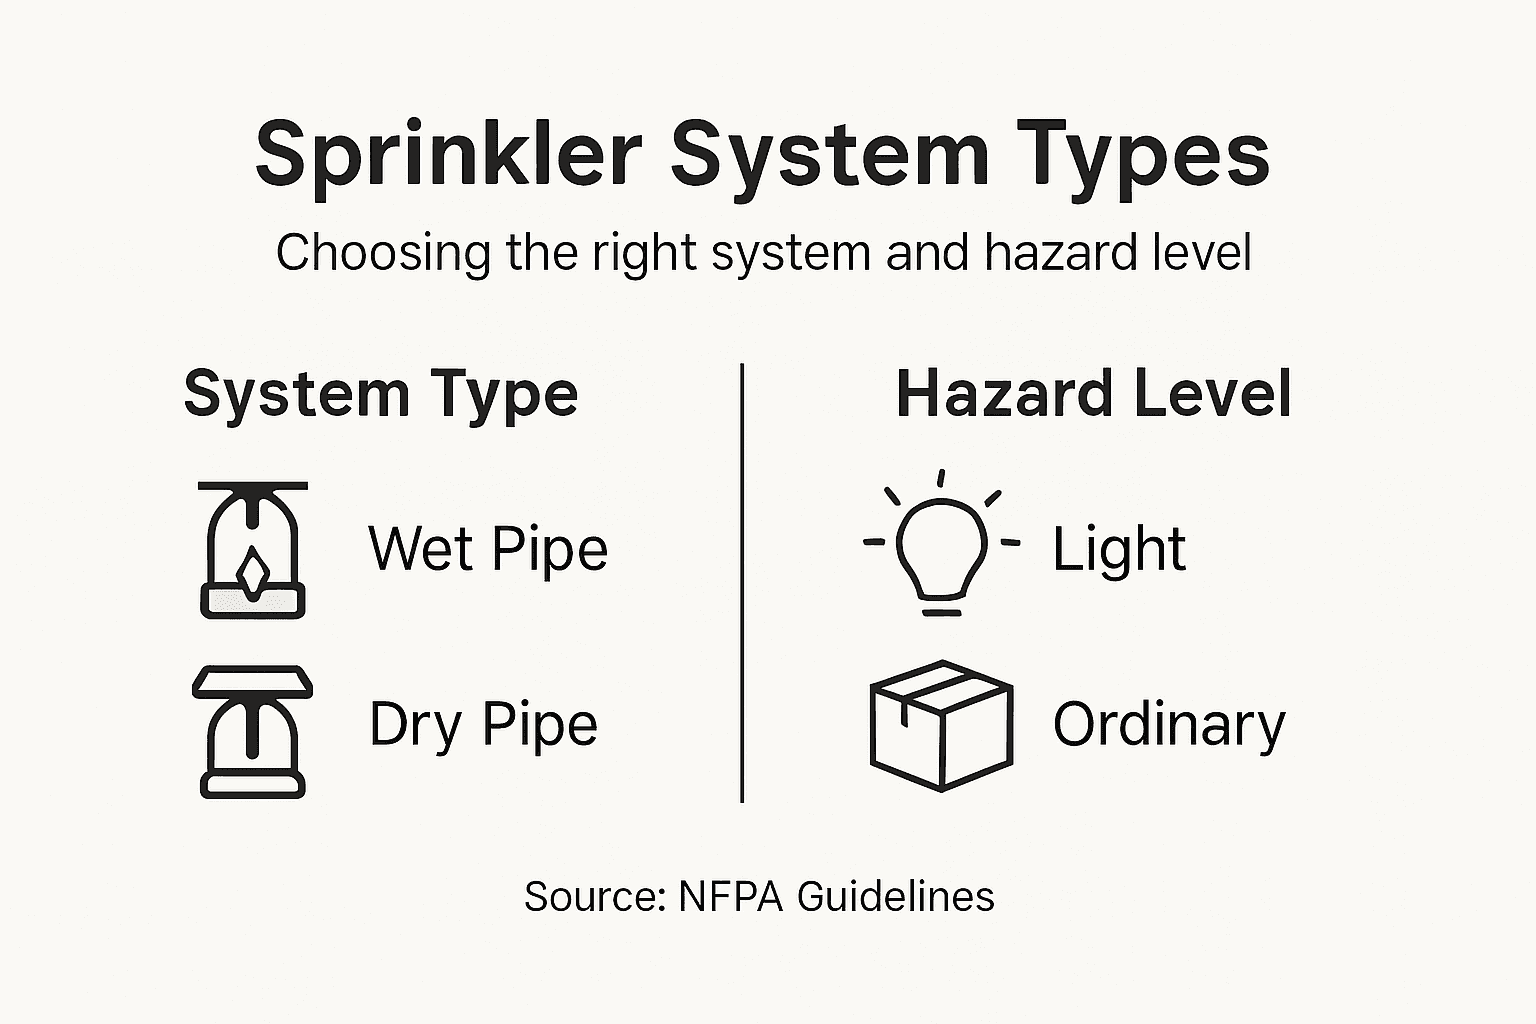
Component selection matters just as much as layout. You’ll choose between different sprinkler head types, each designed for specific applications. Upright heads spray water upward and outward, pendant heads hang down and spray downward, and sidewall heads direct water sideways. Your building’s ceiling height, structural elements, and room layout determine which types work best. Your contractor should present you with a detailed design plan showing head locations, pipe routes, valve locations, and water supply connections. Review this plan against your building layout to confirm it covers all occupied spaces. Ask questions about any areas that look sparse or seem like they might have coverage gaps.
Here’s a quick reference comparing the main fire sprinkler system types and their typical applications:
| System Type | Best Application | Key Advantage |
|---|---|---|
| Wet System | Offices, retail spaces | Fastest activation, simplest design |
| Dry System | Parking garages, unheated areas | Prevents pipe freezing, suitable for cold |
| Pre-action System | Data centers, museums | Reduces accidental discharge risk |
| Deluge System | Chemical storage, high hazard areas | Rapid large-area water coverage |
Pro tip: Request that your designer provide the sprinkler system layout on the same floor plans your tenants use. When your tenants see where heads are located and understand how the system protects them, they’re more likely to respect the installation and avoid blocking sprinklers with stored items or equipment later on.
Step 3: Prepare workspace and gather required permits
You’re almost ready to install. Before any contractor sets foot on your property with tools and materials, you need permits in hand and your workspace prepared. This step protects you legally, ensures the work meets code, and prevents costly delays once installation begins.
Start with the permitting process. Your contractor typically handles submitting the sprinkler system plans to your local building and fire departments, but you need to understand what happens during this phase. The departments review your plans against NFPA 13 standards and local codes to confirm the design is compliant. Obtaining proper permits requires submitting plans that comply with local codes and getting approval from appropriate authorities before installation starts. This process varies significantly by jurisdiction. Houston’s permitting can take anywhere from two to four weeks, depending on whether the building department has questions about your plans. Some jurisdictions require a third party plan reviewer to sign off, which adds time. Ask your contractor for a realistic timeline and stay on top of the process. If inspectors request plan revisions, the clock restarts. Don’t assume silence means approval. Call the building department directly and confirm when your permits will be issued. Get documentation showing approval in writing so you have proof for your files and your insurance company.
While permits are being processed, prepare your workspace. This sounds simple but makes a huge difference in installation speed and safety. Clear the areas where pipes will run. Remove stored items from ceiling spaces, attics, and crawl spaces that your contractor needs to access. If your building has tenants, give them advance notice about the work, timeline, and any areas they cannot access during installation. Talk with your facilities team about water shut off points, electrical panels, and other infrastructure the contractor needs to know about. Confirm that installation areas are clean, accessible, and well lit. Your contractor needs to run measurements, drill holes, and install brackets precisely. Poor lighting and cluttered spaces slow work down and increase error risk. Coordinate with any other trades working in the building so you don’t have plumbers, electricians, and sprinkler installers competing for the same spaces simultaneously. Verify that all materials your contractor plans to use meet regulatory specifications. Some jurisdictions require specific component brands or certifications. Your contractor should provide material specifications in advance so you can confirm everything aligns with local requirements. This prevents situations where materials arrive and then get rejected by the building inspector.
Pro tip: Assign one person from your organization as the installation coordinator who stays in contact with your contractor throughout the process. This person should know where permits are in the approval cycle, confirm workspace is ready when needed, and be available to answer questions about building access, water supplies, and electrical connections on installation day.
Step 4: Install fire sprinkler pipes and heads securely
This is where your plans become reality. Your contractor will run pipes through walls, ceilings, and crawl spaces, then mount sprinkler heads at precise locations. The installation demands accuracy and attention to detail because every connection, bracket, and head position affects how effectively the system protects your building during a fire.
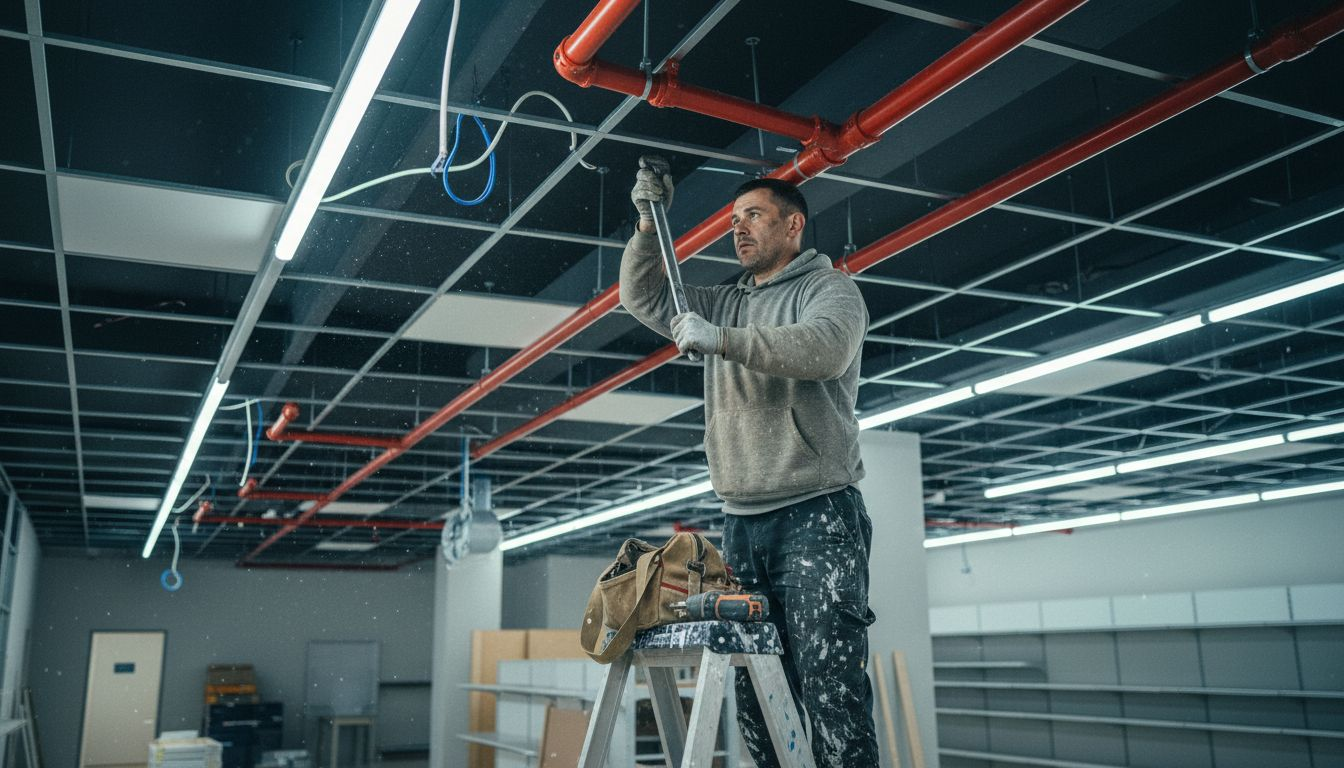
Your contractor begins by running the main supply line from your water source to the system’s main shut off valve and backflow preventer. This backbone must be sized correctly and installed with proper support. From there, branch lines feed into smaller zones throughout the building. Pipes get fastened to structural members using approved hangers and clamps spaced at code-required intervals. The spacing matters because unsupported pipes can sag under water weight or vibrate loose over time. Your contractor will drill through studs, joists, and beams carefully to avoid hitting electrical wiring or plumbing. Every hole gets sealed afterward to maintain fire ratings in walls and floors. Pipe connections use threaded fittings or grooved couplings, depending on your system type. Each connection gets tightened to exact specifications and tested for leaks before walls close up. If you have tenants in the building during installation, your contractor should minimize disruption by scheduling work during off hours and sealing off dust and debris. Watch for pipe routing that seems inefficient or creates unnecessary elbows and bends. More bends mean more pressure loss and potentially reduced flow to distant heads.
Sprinkler head installation requires the same precision as piping. Your contractor positions each head at the exact location shown on approved plans, then secures it firmly to prevent movement. Heads must be oriented correctly. Upright heads point straight up, pendant heads hang down, and sidewall heads angle sideways according to specifications. The mounting bracket must be rock solid. A loose head can vibrate and eventually fail. Your contractor will test the system after installation, running water through every zone to confirm pressure and flow rates match design specifications. This testing reveals any undersized pipes, blocked lines, or malfunctioning heads before the building inspector arrives. You should attend the pressure test and watch for any areas where flow seems weak. After the contractor completes installation, the building department will conduct a final inspection. The inspector verifies that all work matches the approved plans, that pipes are supported correctly, that heads are positioned properly, and that the system functions. This inspection determines whether you receive your certificate of compliance, which you need for occupancy permits and insurance purposes.
Pro tip: Schedule a walkthrough with your contractor before final testing to understand the system layout, main shut off valve location, zone valve locations, and how to drain the system if maintenance is needed later. Taking photos of the installed system before walls and ceilings close up gives you valuable documentation of what lies behind the finished surfaces.
Step 5: Test system functionality and inspect for leaks
Installation is complete, but your system is not operational until it passes rigorous testing. This critical phase verifies that every component functions properly and identifies any leaks or deficiencies before the building inspector arrives. Think of it as your quality assurance checkpoint before the system goes live.
Your contractor will conduct several types of tests. The first is a visual inspection of the entire system. Your contractor walks every pipe run, checks every connection, examines sprinkler heads for damage or corrosion, and verifies that all supports and brackets are secure. Look for any signs of corrosion, bent pipes, loose fittings, or damaged heads. During this inspection, your contractor documents the system with photos and detailed notes. Next comes pressure testing. Your contractor isolates sections of pipe using isolation valves and applies water pressure to each zone, watching for any leaks at connections, along seams, or from hairline cracks. A pressure gauge monitors system pressure throughout the test. Any drop in pressure indicates a leak somewhere. The contractor will locate and repair leaks immediately. Testing fire sprinkler systems includes thorough inspections and functional tests to ensure every component works correctly, including pressure tests and water flow tests via main drains. Your contractor will run water through the main drain to observe actual flow rate. This confirms that the system delivers the water volume and pressure required by code. The main drain test also reveals any restrictions in supply lines or undersized pipes that might limit flow. Alarm system checks follow. Your contractor will activate the alarm valve and verify that the alarm bell or electronic alarm sounds properly. This confirms that if a sprinkler head opens during a fire, occupants will hear the warning. Control valve checks ensure that all zone valves operate smoothly and seal properly when closed.
Once all tests pass, your contractor prepares documentation. NFPA 25 outlines the required testing and inspection of fire sprinkler systems, mandating regular visual inspections, flow tests, valve and gauge checks, and comprehensive documentation of inspections and repairs to maintain compliance. This documentation becomes your record of system performance and is required for building department sign off and insurance purposes. You should receive copies of all test results, pressure readings, flow measurements, and repair work performed. Keep these documents in a safe location. The building inspector will review them during the final inspection. If any issues arise, the inspector will cite them and the contractor will correct them before certification. Once everything passes inspection, you receive your certificate of compliance, which proves your building meets all fire safety code requirements.
Pro tip: Attend the pressure test and main drain flow test personally so you understand how your system performs and what normal operation looks and sounds like. This knowledge helps you spot problems during future annual inspections and maintenance checks.
Ensure Your Commercial Space Meets Fire Sprinkler Safety Standards with Trusted Expertise
Installing fire sprinklers is a critical step to protect your commercial property, but navigating building codes, system design, and installation details can feel overwhelming. This article highlights common challenges like understanding local regulations, selecting the right system type, and conducting thorough testing to avoid costly mistakes that jeopardize safety and compliance. At Reliable Fire Protection, we specialize in these exact areas to help Houston businesses confidently meet fire protection requirements while safeguarding lives and property.

Don’t leave your fire sprinkler installation to chance. Partner with experts who provide comprehensive solutions from initial assessment through final inspection. Visit our Fire Protection – Reliable Fire Protection page to explore services specifically tailored for commercial spaces. Our certified team ensures every pipe, sprinkler head, and system component is correctly designed and installed according to local codes. Act now to secure your building with professional fire sprinkler installation and ongoing support. Contact us today at Reliable Fire Protection to request a free consultation and take the first step toward a safer, fully compliant commercial environment.
Frequently Asked Questions
What are the first steps in installing fire sprinklers for commercial spaces?
Before installing fire sprinklers, assess your property needs by documenting key information like square footage, number of stories, occupancy type, and construction type. Contact your local fire marshal’s office to understand specific codes and regulations that apply, ensuring you meet compliance expectations before proceeding.
How do I determine the sprinkler layout for my building?
To plan your sprinkler layout, classify your building’s hazard level, which will impact the system design. Work with a designer to map out head locations and ensure optimal coverage, taking into account any obstructions that could impede water flow when a fire occurs.
What permits are required for installing a fire sprinkler system?
You need to obtain the appropriate building and fire permits for your fire sprinkler installation. This process usually involves submitting your system plans for review by local authorities and can take anywhere from two to four weeks, so start this early to avoid delays.
How is the functionality of the fire sprinkler system tested?
The system’s functionality is tested through visual inspections, pressure tests, and flow tests. Conduct these tests after installation to identify any leaks or deficiencies and ensure that all components operate correctly before the final inspection by the building department.
What should I do if there are issues during the sprinkler system installation?
If issues arise during installation, immediately address them with your contractor to make necessary corrections. Document any problems and the solutions implemented to maintain a clear record, ensuring the final installation meets all safety standards.
How can I prepare my workspace for the sprinkler installation?
Clear the areas where the sprinkler system will be installed, removing any obstacles that could interfere with the contractor’s work. Coordinate with tenants and other trades to ensure the installation area is clean, accessible, and well-lit to facilitate a smooth installation process.
Recommended
- Role of Sprinkler Systems in Houston Safety Compliance
- Master Fire Sprinkler System Workflow for Compliance
- Fire Suppression System Setup Guide: Complete Installation Steps
- 7 Must-Have Fire Safety Equipment Tips for Houston Managers
- Fire Alarm System University Place TX
- Fire Alarm System Bellaire TX