TL;DR:
- Proper placement, correct tools, and regular maintenance of smoke detectors ensure effective fire protection in homes. Interconnected hardwired systems with brand consistency offer optimal safety, while regular testing and replacement extend their functionality. Following local codes and manufacturer instructions is essential for reliable smoke alarm performance and compliance.
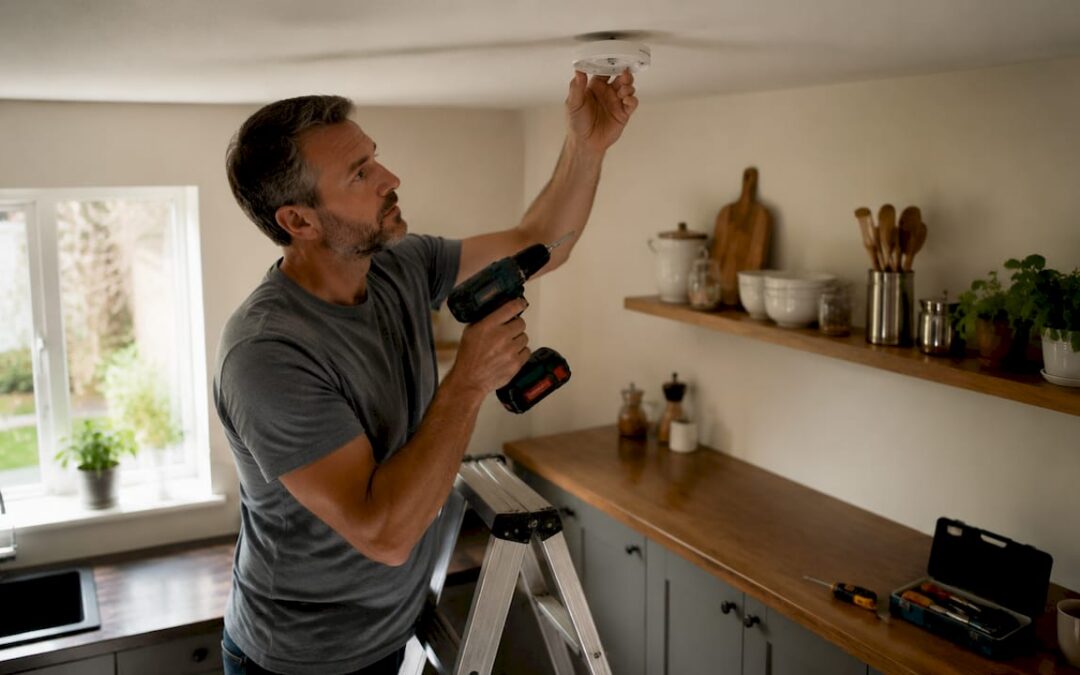
Smoke detectors are the first line of defense against fire fatalities in any home, and knowing how to install smoke detectors correctly can mean the difference between a close call and a tragedy. The National Fire Protection Association (NFPA) sets clear standards for placement and wiring, and brands like First Alert and BRK have built their installation guides around those same rules. Whether you are a first-time homeowner or a tenant upgrading an older unit, this smoke detector installation guide walks you through every step, from tools to testing, with no guesswork required.
What tools and materials do you need first?
Gathering the right tools before you start saves time and prevents mid-job trips to the hardware store. The list differs depending on whether you are installing a battery-powered unit or a hardwired alarm.
For battery-powered detectors, you need:
- Power drill with a 3/16-inch bit
- Phillips head screwdriver
- Pencil for marking drill points
- Wall anchors and mounting screws (usually included with the unit)
- Fresh batteries (check the manufacturer spec, typically 9V or AA)
For hardwired detectors, add these to the list:
- Non-contact voltage tester
- Wire stripper
- 14/2 NM-B cable for power supply runs
- 14/3 NM-B cable for interconnected units (the third wire carries the interconnect signal)
- Wire nuts and electrical tape
Pro Tip: Before touching any wiring, use a non-contact voltage tester to confirm the circuit is dead. Flipping the breaker is not enough. Testers from Klein Tools or Fluke cost under $30 and remove all doubt.
| Item | Battery-Powered | Hardwired |
|---|---|---|
| Drill and bits | Required | Required |
| Voltage tester | Optional | Required |
| 14/2 NM-B cable | Not needed | Required |
| 14/3 NM-B cable | Not needed | Required for interconnect |
| Batteries | Required | Backup only |
Choosing between detector types matters beyond convenience. Hardwired units with battery backup provide the best protection because they stay active even during power outages. Battery-only units are simpler to install but depend entirely on you remembering to replace the batteries.
Where should you place smoke detectors in your home?
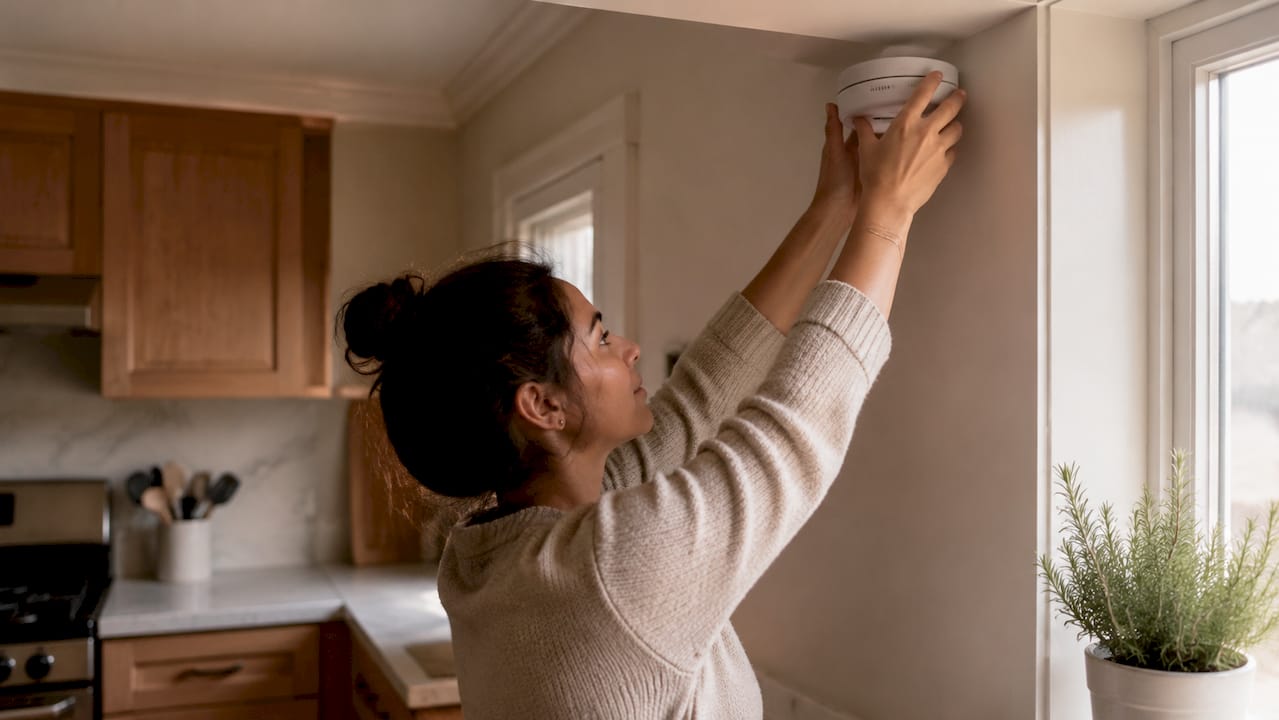
Placement is the most misunderstood part of installing smoke alarms. A detector in the wrong spot either misses a fire or triggers false alarms constantly, and both outcomes are dangerous.
NFPA and state guidelines require detectors on every level of the home, inside every bedroom, and in the hallway outside each sleeping area. That means a two-story home with three bedrooms needs a minimum of five units. Many jurisdictions go further, mandating interconnected alarms so every unit sounds when one detects smoke.
Best locations for smoke detectors:
- Ceiling center of each bedroom
- Hallway outside bedroom doors
- Living room ceiling
- Basement ceiling near the stairway
- Each additional floor level
Locations to avoid:
- Within 10 feet of cooking appliances (stoves, ovens, toasters)
- Near bathroom doors where steam triggers false alarms
- Within 3 feet of air supply vents or ceiling fans
- In garages where exhaust fumes cause nuisance trips
Height placement follows a specific rule. Ceiling-mounted units must sit at least 4 inches from any wall, and wall-mounted units must hang 4–12 inches below the ceiling. Smoke rises and pools near the ceiling, so mounting too low means the alarm reacts slower.
Pro Tip: Avoid placing detectors directly above air vents. Moving air disperses smoke before it reaches the sensor, delaying the alarm. Check your HVAC register locations before marking drill points.
For guidance on how smoke detectors compare to heat detectors in specific rooms like garages and attics, the smoke vs. heat detector comparison from Reliable-fire-protection breaks down which technology fits each space.
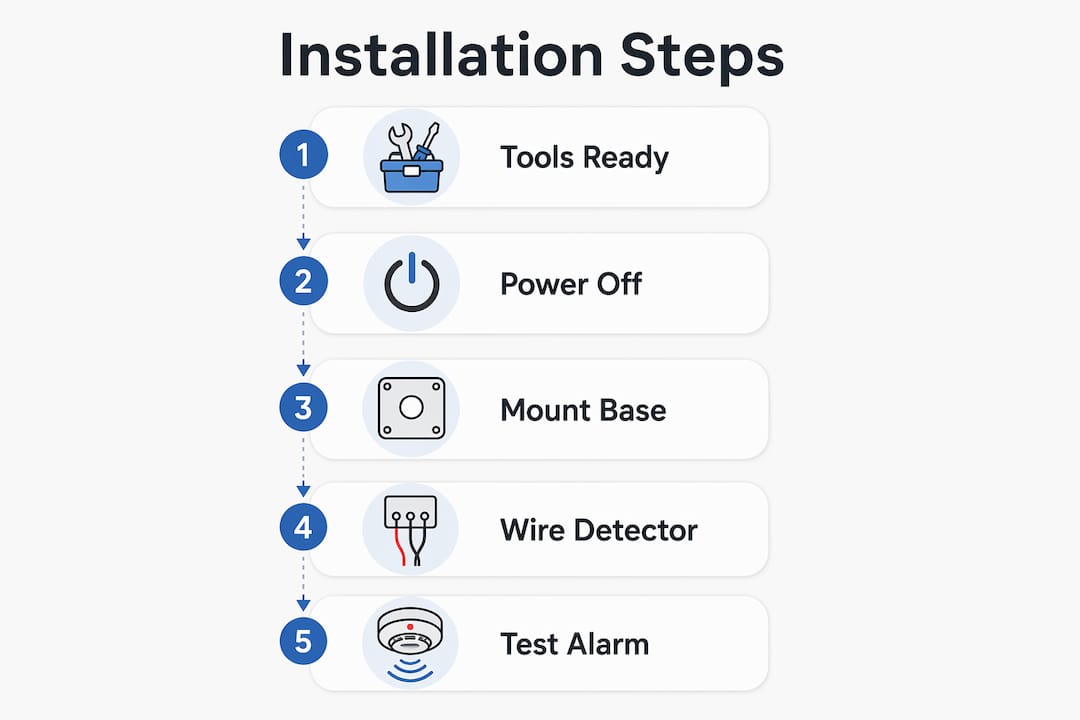
How do you install smoke detectors step by step?
The installation process splits into two tracks: battery-powered and hardwired. Both start with the same prep work.
Installing a battery-powered detector
- Hold the mounting base against the ceiling at your chosen location and mark the screw holes with a pencil.
- Drill pilot holes and insert wall anchors if you are not hitting a joist.
- Screw the base plate firmly to the ceiling.
- Insert the batteries into the detector body.
- Align the detector with the base plate and twist clockwise until it locks.
- Press the test button and hold it for 5 seconds. A loud beep confirms the unit works.
Installing a hardwired detector
Always turn off the circuit breaker and verify zero voltage with your tester before touching any wires. This step is non-negotiable.
- Pull the wiring through the electrical box already mounted in the ceiling.
- Connect black wire to black (hot), white wire to white (neutral), and red wire to red (interconnect) using wire nuts.
- Wrap each connection with electrical tape for a secure finish.
- Attach the wiring harness connector from the detector to the matching plug on the cable.
- Mount the base plate over the electrical box and secure with screws.
- Twist the detector body onto the base until it clicks.
- Restore power at the breaker and press the test button.
For a daisy chain interconnect system, 14/3 cable runs from unit to unit, with the red wire carrying the signal that triggers all alarms simultaneously. This is the setup most local codes require for new construction and major renovations.
| Step | Battery-Powered | Hardwired |
|---|---|---|
| Power safety check | Not required | Required, use voltage tester |
| Wiring connection | None | Black, white, red wire nuts |
| Mounting method | Base plate, twist lock | Base over electrical box |
| Testing | Press test button | Restore power, press test button |
| Interconnect capable | No (most models) | Yes, via red wire |
Pro Tip: Use the same brand for every unit in an interconnected system. Mismatched brands can cause interconnect failure because proprietary signaling protocols on the red wire are not universal, even when the physical connectors look identical.
For a broader look at how detection systems connect and communicate, the fire detection system setup guide from Reliable-fire-protection covers the full picture for Houston homeowners.
Before starting any hardwired installation, check whether your project requires a permit. A residential electrical permits guide explains what typically triggers a permit requirement for wiring work in your home.
How do you maintain smoke detectors after installation?
Installation is the beginning, not the end. A smoke detector that is never tested or cleaned gives you a false sense of security.
Nearly all smoke alarm failures trace back to missing or dead batteries. That single fact explains why monthly testing and annual battery replacement are the two most important maintenance habits you can build. Ten-year sealed battery alarms from brands like Kidde eliminate the annual swap, but you still need to test them monthly.
Monthly and annual maintenance checklist:
- Press the test button monthly and confirm a loud alarm tone
- Replace standard batteries every 12 months, even if the unit has not chirped
- Vacuum the detector with a soft brush attachment every 6 months to clear dust from the sensor chamber
- Check the manufacture date label on the back of each unit
Detectors must be replaced every 10 years regardless of whether they still seem to work. Sensors degrade over time in ways you cannot see or test. If there is no manufacture date label on the back, replace the unit immediately.
Chirping is the signal most homeowners misread. A chirp every 30–60 seconds usually means low battery, but a chirp pattern indicating end-of-life sounds different and will not stop after a battery swap. Check the manufacture date first. If the unit is 8 years old or older, replace it rather than troubleshoot it.
Pro Tip: Set a recurring calendar reminder every October, when daylight saving time ends, to test every detector and replace batteries. It takes 15 minutes and keeps you on schedule without relying on memory.
For ongoing alarm maintenance beyond the basics, the fire alarm maintenance tips resource from Reliable-fire-protection covers compliance-focused upkeep for both homeowners and property managers.
Key takeaways
Proper smoke detector installation requires correct placement, the right tools, and consistent maintenance to deliver reliable fire protection year after year.
| Point | Details |
|---|---|
| Placement follows NFPA rules | Install on every level, inside bedrooms, and outside sleeping areas for full coverage. |
| Height matters | Mount ceiling units at least 4 inches from walls; wall units 4–12 inches below the ceiling. |
| Hardwired needs safety prep | Always kill power and verify with a voltage tester before connecting any wires. |
| Brand consistency is critical | Use one brand across all interconnected units to prevent red-wire signaling failures. |
| Replace every 10 years | Sensor degradation is invisible; check the manufacture date label and replace on schedule. |
What i’ve learned installing alarms in hundreds of houston homes
Most DIY smoke detector mistakes are not about wiring. They are about placement. Homeowners routinely mount detectors directly above the stove or within a foot of a bathroom door, then complain the alarm goes off every time they cook or shower. The fix is simple: follow the 10-foot kitchen rule and keep units away from steam sources. The NFPA did not write those rules arbitrarily.
The second mistake I see constantly is mixing brands on interconnected systems. Two units from different manufacturers may physically connect, but the red interconnect wire will not carry the signal reliably. One alarm goes off and the rest stay silent. That defeats the entire purpose of interconnection. Stick with one brand, whether that is First Alert, Kidde, or BRK, and buy all your units at the same time.
Local codes also matter more than most homeowners realize. Texas and many other states have updated requirements for new construction and renovations that go beyond the federal minimum. Consulting local fire code guidelines before you buy your detectors saves you from having to redo the work. A quick call to your local fire marshal’s office takes five minutes and gives you a definitive answer.
The last thing worth saying: read the manufacturer instructions for your specific model. First Alert and BRK both publish detailed, model-specific guides that account for ceiling texture, mounting hardware variations, and battery type. Generic advice gets you 80% of the way there. The manufacturer instructions get you the rest.
— Reliable-fire-protection
Professional fire safety support from Reliable-fire-protection
Installing smoke detectors yourself is a solid first step, but a complete fire safety system goes further than individual alarms.
Reliable-fire-protection is a Houston-based, family-owned fire safety company serving residential and commercial clients across Midtown, Montrose, Houston Heights, and surrounding neighborhoods. The team installs, inspects, and certifies fire alarm systems to meet Texas state codes and NFPA standards. If you want to understand how your detectors fit into a broader protection plan, start with the fire alarm systems overview on the Reliable-fire-protection website. For a free quote or to schedule a professional installation consultation, contact Reliable-fire-protection directly and get certified expertise on your side.
FAQ
How many smoke detectors does a home need?
Every level of the home, every bedroom, and every hallway outside a sleeping area requires a detector. A two-story, three-bedroom home needs a minimum of five units under NFPA guidelines.
Can a tenant install smoke detectors without a landlord?
Tenants can install battery-powered detectors without landlord approval in most states, but hardwired installation requires an electrician and landlord consent. Check your lease and local tenant code before starting.
What is the difference between ionization and photoelectric detectors?
Ionization detectors respond faster to fast-flaming fires, while photoelectric detectors detect slow, smoldering fires more reliably. The U.S. Fire Administration recommends using both types or a combination unit for full coverage.
Why does my smoke detector keep chirping after a battery change?
A chirp that continues after a fresh battery is installed often signals end-of-life rather than a power issue. Check the manufacture date on the back of the unit. If it is 8 years old or older, replace the entire detector.
Do hardwired smoke detectors need a permit?
In many jurisdictions, hardwired smoke detector installation counts as electrical work and requires a permit. Review your local residential electrical permit requirements before starting any wired installation to stay compliant.