

Fire escape routes are the immediate, unobstructed, clearly marked paths that move every occupant from any point in a building to a safe public way outside. Under U.S. standards, every exit route consists of three connected parts:
- Exit access — the path from a workstation, room, or sleeping area to the exit itself
- Exit — the protected portion of travel, separated from the rest of the building by fire-resistant construction
- Exit discharge — the final segment that leads directly outside to a street, walkway, refuge area, or open space large enough to hold evacuating occupants
A route is only effective when all three parts are unobstructed, properly marked, and usable by occupants without keys, tools, or special knowledge. Design alone is not enough. If people don’t know the route, can’t open the door, or find the corridor blocked by stored equipment, the system fails at the moment it matters most.
Table of Contents
- What every escape plan must include
- Physical requirements your escape routes must meet
- Why training and drills are what actually save lives
- Planning for mobility-impaired occupants, high-rises, and smoke hazards
- How to keep escape routes usable: inspection and common failures
- U.S. codes that govern escape route design and compliance
- How fire protection systems make escape routes work in practice
- Key Takeaways
- The part most facility owners get wrong
- Reliable-fire-protection can verify your escape routes meet code
- Useful sources
What every escape plan must include
An escape plan is a documented, posted set of instructions that tells every occupant exactly where to go and what to do when an alarm sounds. For homes, that means a simple floor-plan sketch with two escape routes from each sleeping room and a designated outdoor meeting point. For workplaces and commercial facilities, OSHA 29 CFR 1910.38 requires a written plan covering evacuation procedures, escape route assignments, and a method for accounting for all occupants after evacuation.

Every solid plan covers these minimum elements:
| Plan Element | What to Include |
|---|---|
| Two means of escape | At least two routes from each occupied area, positioned as far apart as practical |
| Primary vs. secondary routes | Primary = shortest, most direct; secondary = alternate if primary is blocked |
| Assembly point | A specific outdoor location away from the building where occupants gather |
| Alarm and extinguisher locations | Marked on the posted floor plan |
| Mobility-assistance instructions | Named person or procedure for occupants who need help |
| Emergency contacts | Names and titles of people to call, per OSHA 1910.38 |
For residential buildings, windows can serve as secondary exits from sleeping rooms, provided they open wide enough for an adult to pass through and the drop to the ground is survivable or a portable escape ladder is available. They are not a substitute for a proper exit in commercial or multi-story occupancies.
Pro Tip: When you create a fire safety plan, walk each route physically before you post the map. You will almost always find at least one obstruction or a door that sticks.
Physical requirements your escape routes must meet
U.S. codes set hard minimums for the design of every egress path. OSHA 29 CFR 1910.36 and NFPA 101 Chapter 7 together define the baseline. Here is what to verify:
- Minimum width: Exit access must be at least 28 inches wide at every point; ceiling height must reach at least 7 feet 6 inches, with no projection dropping below 6 feet 8 inches from the floor.
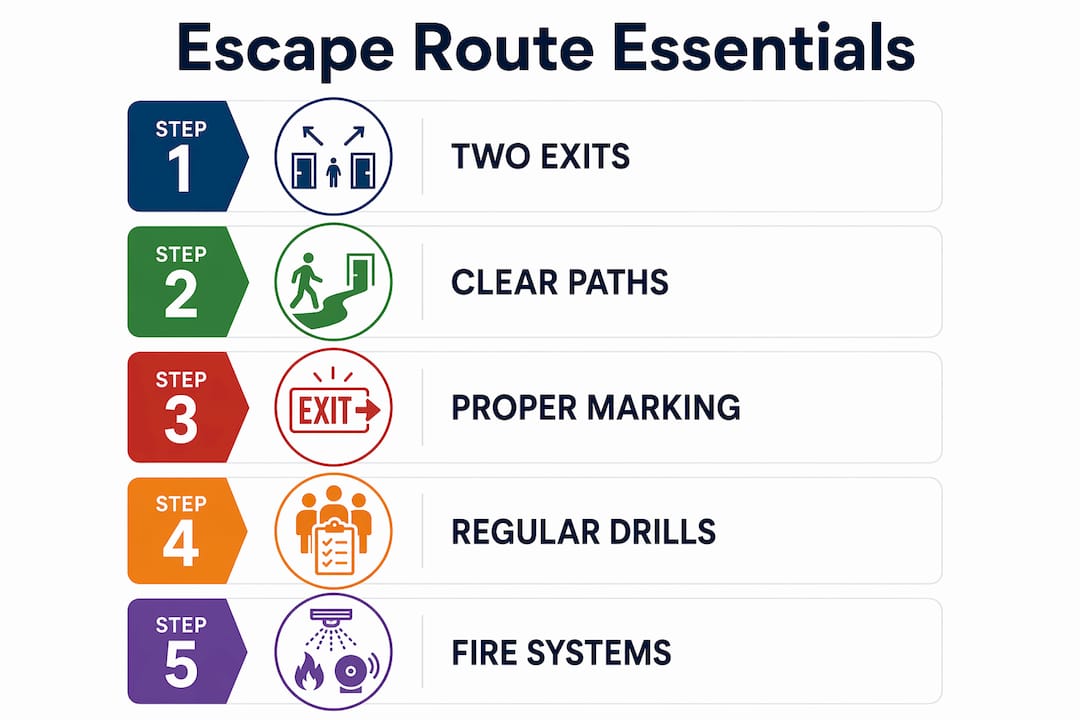
- Two exits required: Most workplaces and occupied buildings must have at least two exit routes, placed as far apart as practical. NFPA 101 requires three exits when occupant load exceeds 500 and four exits at 1,000 occupants.
- Exit separation: Normally measured at one-half the maximum diagonal of the floor area; reduced to one-third when the building is fully sprinklered.
- Travel distance and dead-end limits: Chapter 7 sets travel-distance limits that vary by occupancy type and sprinkler protection. Dead-end corridors are limited to prevent occupants from being trapped.
- Fire-resistance-rated separation: Exits connecting three or fewer stories require a one-hour fire-resistance rating; four or more stories require two hours.
- Door operation: Every exit door must open from the inside with a single releasing operation, without keys, tools, or special knowledge. Doors serving rooms with more than 50 occupants or high-hazard areas must swing in the direction of travel. Panic hardware is required in certain occupancies.
- Emergency lighting: NFPA 101 Chapter 7 requires a minimum of 1 foot-candle of illumination along the path of egress, activating automatically on power loss.
- Exit signage: Signs must be visible at all times, with letter sizes meeting NFPA 101 specifications. No decoration or secondary sign may obscure an exit door or sign.
Pro Tip: A fully sprinklered building often qualifies for reduced exit-separation requirements and longer allowable travel distances under NFPA 101. If you are planning a renovation, check whether adding a sprinkler system unlocks design flexibility that lowers your construction cost.
Why training and drills are what actually save lives
You can build a perfectly code-compliant egress system and still have people die in a fire. That happens when occupants don’t know the routes, freeze at unfamiliar doors, or wait for someone else to lead. Egress infrastructure fails without occupant training and documented drills — alarms, exits, and people must work together.
Here is a practical drill framework for any occupancy:
- Set objectives before the drill. Define what you are testing: route recognition, assembly-point accuracy, time to full evacuation, or visitor handling.
- Assign roles. Designate a floor warden for each floor or zone, an alarm monitor, and an accountability officer at the assembly point.
- Announce or don’t. Announced drills build familiarity; unannounced drills reveal real response times and expose gaps that rehearsed drills hide.
- Time the evacuation. Record the time from alarm activation to full assembly-point accountability.
- Walk the route with visitors in mind. Visitors and contractors don’t know your building. Someone must be assigned to guide them.
- Debrief immediately. Document what worked, what failed, and what needs to change before the next drill.
- File the record. Keep written documentation of every drill: date, time, occupant count, roles, and findings.
For homes, NFPA recommends practicing escape routes at least twice a year. For commercial and institutional facilities, frequency depends on occupancy type — schools typically drill monthly during the school year; healthcare and high-rise facilities follow occupancy-specific schedules under NFPA 101.
Pro Tip: Run at least one drill with a blocked primary exit. Occupants who have only ever practiced the main route will hesitate when it’s unavailable. Documented drills that test secondary routes are the ones that actually prepare people.

Planning for mobility-impaired occupants, high-rises, and smoke hazards
Standard egress planning assumes ambulatory occupants moving at a normal pace. Three scenarios require a different approach.
- Mobility-impaired occupants. Stairwells are not accessible to wheelchair users or others with limited mobility. NFPA 101 and the IBC both recognize areas of refuge: fire-rated spaces, typically adjacent to a stairwell, where non-ambulatory occupants can wait safely for assisted evacuation. Some newer high-rises are equipped with occupant-evacuation elevators that meet specific fire-resistance and communication standards. Every facility with mobility-impaired occupants should have a named, trained individual assigned to assist them and a documented plan that does not rely on improvisation.
- High-rise buildings. Above the seventh floor, standard egress assumptions break down. High-rise codes require smokeproof enclosures or pressurized stairwells to prevent smoke migration into the egress path. Occupants above the fire floor are often directed to shelter in place rather than evacuate immediately, which means communication from the fire command center to each floor is a critical egress component, not an optional feature.
- Smoke and heat hazards. Smoke kills faster than flame in most building fires. The strategies that keep escape routes viable are compartmentation (fire-rated walls and doors that slow smoke spread), stair pressurization (positive air pressure that keeps smoke out of stairwells), and early alarm detection that gives occupants maximum time to act. OSHA notes that smoke and heat can narrow the usable window for evacuation to roughly one to two minutes once an alarm sounds. That timeline is why every second of delay from a slow alarm or a blocked door matters.
How to keep escape routes usable: inspection and common failures
A route that was clear last month may be blocked today. Maintaining egress requires a regular inspection cadence, not a one-time setup.
Recommended inspection schedule:
- Daily/weekly: Visual check of exit access paths for stored materials, equipment, or debris. Exit access is legally part of the egress system under OSHA 1910.37, and storing boxes in a corridor is one of the most commonly cited violations.
- Monthly: Test emergency lighting for activation on simulated power loss; verify exit signs are illuminated and unobstructed; check that all exit doors open freely with a single motion.
- Annual: Documented review tied to your fire-system maintenance schedule, covering travel distances, door hardware, signage condition, and fire safety testing records.
Statistic callout: OSHA guidance warns that smoke and heat can render primary escape routes unusable within one to two minutes of alarm activation. A blocked corridor or a chained exit door during that window is not a minor violation — it is a life-safety failure.
Common failures and immediate fixes:
| Failure | Immediate Fix |
|---|---|
| Stored materials blocking exit access | Remove immediately; mark the floor with painted lines or tape to define the clear zone |
| Locked or chained exit door | Remove secondary hardware now; secondary security devices on egress doors are a major compliance failure |
| Unlit or missing exit sign | Replace lamp or sign before the next business day; document the repair |
| Obstructed stairwell | Clear and post a “no storage” sign; assign a responsible party for weekly checks |
| Propped-open fire door | Close and latch; repair or replace the door closer |
During construction or renovation, OSHA requires that exit routes remain accessible throughout the work, or that documented, equivalent alternative measures are in place. A building should not remain occupied if a required exit is disabled without a compliant alternative.
U.S. codes that govern escape route design and compliance
Three primary standards define what escape routes must look like in the United States. Understanding which one applies to your situation determines where you look for answers.
- OSHA 29 CFR 1910 Subpart E (1910.33–1910.39): Governs workplace exit routes and emergency action plans. Applies to most general-industry employers. Covers design, construction, maintenance, and the written emergency action plan requirement. Employers who comply with NFPA 101 or the International Fire Code are considered in compliance with OSHA’s exit-route provisions.
- NFPA 101 Life Safety Code, Chapter 7: The baseline egress chapter used by most state and local building and fire codes. Sets travel-distance limits, dead-end limits, exit counts, door hardware rules, emergency lighting specs, and signage requirements. Occupancy-specific chapters (schools, healthcare, assembly, high-rise) modify Chapter 7 baselines.
- International Building Code (IBC), Chapter 10: The model code adopted (often with amendments) by most U.S. jurisdictions for new construction and major renovations. Covers means of egress in a format parallel to NFPA 101 but with some differences in travel distances and occupancy thresholds.
How to use these references:
- Start with NFPA 101 Chapter 7 for the general egress rules, then check the occupancy chapter that matches your building type.
- Cross-reference the IBC if your jurisdiction adopted it as the primary building code — your local Authority Having Jurisdiction (AHJ) can confirm which edition and amendments apply.
- For workplace compliance, verify against OSHA 1910.36 and 1910.37 regardless of which building code governs construction.
- When in doubt, contact your local AHJ. Local amendments frequently modify travel distances, occupancy thresholds, and sprinkler requirements in ways that override the model code.
How fire protection systems make escape routes work in practice
An escape route is a passive feature. It does nothing until a fire starts. What converts a code-compliant corridor into a survivable evacuation path is the active fire protection system surrounding it.
Early detection and alarm notification are the first link. A fire alarm system that detects smoke at the earliest stage gives occupants the maximum available time to reach an exit before conditions deteriorate. Addressable systems can pinpoint the exact device that triggered, letting building staff direct occupants away from the affected zone rather than sending everyone toward the same stairwell.
Automatic sprinklers are the second link. A sprinkler system that activates at the fire’s origin controls heat and smoke spread, which directly preserves the viability of nearby escape routes. Under NFPA 101, full sprinkler protection also allows reduced exit-separation distances and, in some occupancies, extended travel distances.
| Professional service | What it protects | How often |
|---|---|---|
| Fire alarm inspection and testing | Early warning, occupant notification | Annually; more often for high-risk occupancies |
| Sprinkler system inspection | Route viability, heat/smoke control | Quarterly (wet systems); annually for full internal inspection |
| Emergency lighting testing | Egress illumination on power loss | Monthly functional test; annual full-duration test |
| Egress plan review and documentation | Route accuracy, code compliance | Annually or after any floor-plan change |
When evaluating a fire protection contractor, look for documented testing records, certifications from recognized bodies (NICET for alarm and sprinkler technicians), and 24/7 emergency response capability. A contractor who can only respond during business hours is a liability in a post-fire inspection.
Pro Tip: Schedule your annual fire system inspection and your egress plan review on the same date. Findings from one almost always affect the other, and a single site visit costs less than two.
Key Takeaways
Well-designed fire escape routes only protect occupants when they are unobstructed, properly marked, and backed by trained people and functional detection systems.
| Point | Details |
|---|---|
| Two exits are the baseline | Most buildings require at least two exit routes, placed as far apart as practical to prevent both from being blocked simultaneously. |
| One to two minutes is all you have | OSHA notes smoke and heat can render primary routes unusable within one to two minutes of alarm activation — obstructions and locked doors eliminate that margin entirely. |
| Doors must open with one motion | Exit doors must open from the inside with a single releasing operation; chains, deadbolts, or secondary locks on egress doors are a major compliance failure. |
| Inspect on a schedule | Daily visual checks for blocked exit access, monthly lighting and sign tests, and annual documented reviews tied to fire-system maintenance keep routes reliably clear. |
| Reliable-fire-protection | Provides alarm and sprinkler inspection, emergency lighting testing, and egress plan review to validate routes against OSHA and NFPA 101 requirements. |
The part most facility owners get wrong
Most facility owners treat escape routes as a construction problem — get the widths right, hang the signs, pass the inspection, and move on. That framing misses the most common cause of egress failure: the building changes after the inspection.
A storeroom gets repurposed. A contractor props open a fire door for a week. A new employee stacks boxes in the corridor because there is nowhere else to put them. None of these show up on the original compliance record, and none of them get caught until the next annual review — or until there is a fire.
The facilities that consistently perform well in real evacuations share one habit: someone walks the egress paths every week. Not a formal inspection, just a two-minute walk. That habit catches the propped door, the blocked corridor, and the burned-out exit sign before they become a fatality statistic. Pair that weekly walk with documented drills that test secondary routes and include visitors, and you have a system that actually works under pressure, not just on paper.
Reliable-fire-protection can verify your escape routes meet code

Getting your escape routes right on paper is one thing. Knowing they will hold up during a real fire inspection — or a real fire — requires documented testing by a qualified contractor. Reliable-fire-protection provides fire alarm inspection and commissioning, sprinkler system testing and maintenance, emergency lighting verification, and egress plan review for residential and commercial properties throughout Houston and surrounding areas. Every service produces written documentation you can present to your AHJ, your insurer, or OSHA.
If your last alarm test or sprinkler inspection is more than a year old, or if you have never had a formal egress plan review, that gap is a compliance risk today. Request a free quote and get a clear picture of where your routes stand against current OSHA and NFPA 101 requirements.
Useful sources
These are the primary references used throughout this article. Consult them directly to verify requirements for your specific occupancy and jurisdiction.
- OSHA Emergency Exit Routes Fact Sheet: Plain-language summary of exit-route requirements, door rules, and the three-part egress system. A good starting point for any facility manager.
- OSHA 29 CFR 1910.36: The full regulatory text for exit-route design and construction in general-industry workplaces. Check here for width, height, separation, and door-operation requirements.
- OSHA 29 CFR 1910.37: Covers maintenance, safeguards, and operational features — including the one-to-two-minute evacuation timeline and construction-period obligations.
- OSHA 29 CFR 1910.38 — Emergency Action Plans: Minimum requirements for written emergency action plans, including evacuation procedures and escape route assignments.
- NFPA 101 Life Safety Code, Chapter 7: The baseline egress chapter for travel distances, dead-end limits, emergency lighting, and signage. Access through NFPA.org; your local AHJ can confirm which edition your jurisdiction has adopted.
- International Building Code (IBC), Chapter 10: Means-of-egress requirements for new construction and major renovations. Adopted with local amendments by most U.S. jurisdictions; verify the current edition with your local building department.
- Local Authority Having Jurisdiction (AHJ): Your city or county fire marshal’s office is the definitive source for local amendments to NFPA 101 and the IBC. Always confirm requirements with the AHJ before finalizing an egress design or plan.